skip to main |
skip to sidebar
Today I wanted to share with our readers a project that I completed a couple of weeks ago that was so much fun! I found an old picture frame at a local thrift store that had no glass or anything with it for only $2! I hate that I didn't take a before picture because it was truly hideous: gold paint that was chipping and turning green... completely gross-looking! I knew this piece had potential, it just needed a little primer, paint, and glaze! I had seen some picture on Etsy and different blogs about people turning old frames into earring holders by adding a piece of screen to the back of the frame. If you are like me and have entirely too many earrings and no where to store them, this will be the perfect DIY for you!
I definitely recommend using spray Kilz primer. It is so easy to spray your pieces instead on using a brush and trying to get in all the little nooks and crannies if your piece has lots of detail. You can get it for around $7 at Walmart or Lowe's, and there will be plenty left for several projects.

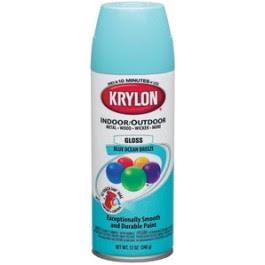
I started out by spraying my frame with 2 coats of this primer. It doesn't take too long to dry, only about an hour or so. Once it was completely dry, I started spraying on my color: Krylon Ocean Blue. I had seen a ton of projects in the blog world done in this color and knew I just had to try it! Krylon makes a ton of different spray paint colors. I found this one at Walmart for about $4 and there is plenty left to do about 5 more earring holders!

Once the paint was finished drying, I added a piece of screen that I found from an old door underneath my house. I measured the amount I would need and used gorilla glue to hold it in the back. If you have a staple gun you could probably use that too, but my frame was a bit fragile and I didn't want to risk cracking it.
The next step is completely optional: glazing your piece! I love the shabby-chic look that the glaze gives it. I used Valspar Tintable Glaze from Lowes with a coffee-bean colored tint added. The can of glaze is a little more expensive: about $15, but i used a tiny, tiny amount for this project and have so much left for future uses! I really just globbed it on the frame, let it sit for about 10 minutes and then wiped away the excess with an old rag. You can leave as much or as little glaze on there as you would like, and it's really easy to add more! The glaze takes a little longer to dry. I would let it sit overnight before hanging it or displaying it however you choose! Here is the finished product! Sorry for the bad picture quality, I took it with my phone!

If you have any fun DIY projects you have completed lately, feel free to share them with us! We love seeing other forms of inspiration for future projects!


No comments:
Post a Comment